- 2 cups old-fashioned oats
- 1 1/2 cups all-purpose flour
- 1 cup packed brown sugar
- 1 cup melted butter
- 1 teaspoon baking soda
- 1/2 teaspoon salt
- 1 cup semi-sweet chocolate chips
- 1 cup caramel bits (or homemade caramel sauce)
- 1/3 cup heavy cream
- 1 teaspoon vanilla extract
- Use Good-Quality Caramel: The better your caramel, the richer and smoother your Carmelitas will taste.
- Experiment with Mix-Ins: Feel free to add nuts like pecans or almonds to the topping for an extra crunch.
- Storage: Carmelitas can be stored in an airtight container at room temperature for up to 3 days or in the refrigerator for up to a week.
- Calories: 290
- Total Fat: 15g
- Carbohydrates: 37g
- Protein: 2g
ADVERTISEMENT
Easy Carmelitas Recipe
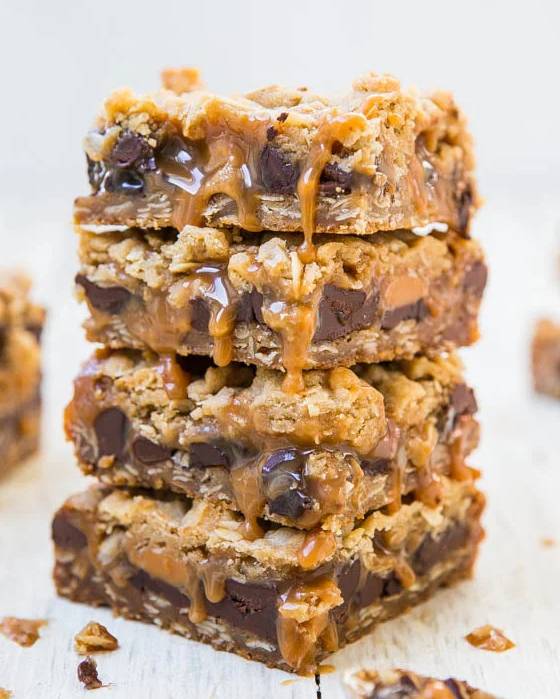
Carmelitas are an all-time favorite dessert for anyone who loves the combination of rich caramel, gooey chocolate, and buttery oats. This indulgent treat hails from traditional American kitchens, where bakers crafted them to please family members with something both simple and delectable. These layered bars combine chewy oats, melted chocolate, and creamy caramel, creating a texture and flavor profile that’s truly irresistible. Our recipe will guide you step-by-step through the process of making the perfect Carmelitas right at home.
The History of Carmelitas
Carmelitas originated as a twist on classic chocolate chip cookies but with a rich, caramel-filled layer added to elevate their decadence. With their ooey-gooey nature and crumbly oat crust, they quickly became a popular dessert in the U.S. Ideal for potlucks, bake sales, and gatherings, Carmelitas have gained a loyal following due to their easy preparation and crowd-pleasing flavors. Today, this treat remains a popular choice for home bakers, as it provides an ideal balance of simplicity, flavor, and versatility.
Ingredients
For the Crust and Topping
For the Filling
Pro Tip: Ensure your butter is fully melted before adding to the mixture for a smooth, even crust and topping layer.
For Ingredients And Complete Cooking Instructions Please Head On Over To Next Page Or Open button (>) and don’t forget to SHARE with your Facebook friends
ADVERTISEMENT
ADVERTISEMENT
Instructions
Step 1: Prepare Your Pan and Preheat Oven
Preheat your oven to 350°F (175°C). Line an 8×8-inch baking pan with parchment paper, ensuring that it hangs over the sides for easy removal. This will prevent sticking and allow for easy cutting and serving later.
Step 2: Create the Crust and Topping
In a large mixing bowl, combine the oats, flour, brown sugar, melted butter, baking soda, and salt. Mix until the ingredients are thoroughly combined, forming a crumbly, moist dough. This mixture will act as both your crust and topping.
Reserve about 1 cup of this mixture for the topping. Press the remaining dough firmly into the bottom of the prepared pan to form an even crust.
Step 3: Partially Bake the Crust
Place the crust into the preheated oven and bake for 10 minutes. This partial baking will help the crust stay firm and chewy under the gooey filling, preventing a soggy bottom layer.
Step 4: Prepare the Caramel Filling
While the crust is baking, prepare the caramel filling. In a small saucepan over low heat, combine the caramel bits and heavy cream. Stir frequently to avoid burning, allowing the caramel to melt completely until smooth. Remove from heat and add in the vanilla extract, stirring until fully incorporated. The caramel should be thick and creamy, making it easy to spread.
Step 5: Layer with Chocolate and Caramel
Once the crust has finished its initial bake, sprinkle the chocolate chips evenly over the hot crust. Then pour the melted caramel mixture over the chocolate chips, spreading it gently to create an even layer.
Step 6: Add the Topping
Take the reserved 1 cup of the oat mixture and sprinkle it over the caramel layer. This topping adds texture, giving the bars their signature chewy and crumbly finish.
Step 7: Bake to Perfection
Return the pan to the oven and bake for an additional 20–25 minutes or until the topping is a golden brown and the caramel is bubbling slightly around the edges. Keep a close eye on the Carmelitas in the final few minutes to avoid over-baking.
Please Head Over To Next Page There Still More ,,,
ADVERTISEMENT
ADVERTISEMENT
Step 8: Cool Completely
Remove the pan from the oven and allow the Carmelitas to cool completely in the pan. For best results, transfer the pan to the refrigerator for an hour before cutting. This cooling period will help the caramel set, making it easier to slice cleanly.
Step 9: Slice and Serve
Once the Carmelitas have fully cooled, lift the bars out of the pan using the parchment paper overhang. Place them on a cutting board and slice them into squares.
Tips for the Perfect Carmelitas
Serving Suggestions
Enjoy Carmelitas on their own or with a scoop of vanilla ice cream for an extra indulgent treat. This dessert is also a wonderful addition to holiday platters or dessert bars, thanks to its rich flavor and delightful texture.
Nutritional Information
While Carmelitas are undoubtedly a treat, here’s an approximate nutritional breakdown for a single square serving:
Please note that these values can vary based on ingredient brands and portion sizes.
Conclusion
Carmelitas are a must-try recipe for anyone who loves the fusion of chocolate, caramel, and oats. Their easy preparation, combined with their luxurious taste, makes them a favorite for all occasions. Whether you’re looking for a classic treat to add to your baking repertoire or need a dessert that’s sure to impress, this Carmelitas recipe has you covered.
ADVERTISEMENT
ADVERTISEMENT
