- 1 can (16 oz) refrigerated biscuit dough (or pizza dough)
Tip: Pillsbury Grands biscuits work great for this recipe. - 1 cup shredded mozzarella cheese
- 1/2 cup mini pepperoni slices (or regular pepperoni, cut into quarters)
- 1/4 cup pizza sauce
- 1/4 cup grated Parmesan cheese
- 1/4 cup unsalted butter, melted
- 2 cloves garlic, minced
- 1 teaspoon dried Italian seasoning
- 1 tablespoon chopped fresh parsley (optional for garnish)
- 1/4 teaspoon salt
- Extra pizza sauce
- Ranch dressing
- Marinara sauce
- Garlic aioli
- Preheat your oven to 375°F (190°C).
- Line a baking sheet with parchment paper or lightly grease it to prevent sticking.
- Open the can of refrigerated biscuit dough. Separate the dough into individual biscuits.
- If you’re using pizza dough, divide it into 8-10 even portions. Roll each portion into small balls.
- Flatten each biscuit or dough ball into a 3-4 inch circle using your hands or a rolling pin.
- Spread 1 teaspoon of pizza sauce in the center of each dough circle. Be careful not to spread it too close to the edges.
- Add a generous pinch of shredded mozzarella cheese (about 1 tablespoon).
- Place 3-4 mini pepperoni slices (or a few pieces of regular pepperoni) on top of the cheese.
- Carefully fold the edges of the dough up and over the filling to form a ball. Pinch the seams tightly to seal the pizza bomb completely.
- Tip: Make sure no sauce or cheese is leaking out; this keeps the bombs intact while baking.
- Place each assembled pizza bomb seam-side down onto the prepared baking sheet. Leave a little space between each one.
- In a small bowl, mix the melted butter, minced garlic, Italian seasoning, and salt. Stir well to combine.
- Brush each pizza bomb generously with the garlic butter mixture.
- Sprinkle grated Parmesan cheese on top of each pizza bomb for an extra cheesy kick.
- Place the baking sheet in the preheated oven and bake for 12-15 minutes, or until the pizza bombs are golden brown and the cheese is bubbling inside.
- Tip: Keep an eye on them after 12 minutes to prevent over-browning.
- Once baked, remove from the oven and let them cool slightly for about 5 minutes.
- Garnish the pizza bombs with chopped fresh parsley for a pop of color and flavor (optional).
- Serve the pizza bombs warm with extra pizza sauce, marinara sauce, or ranch dressing for dipping.
- Seal the Dough Well: Make sure you pinch the seams of the dough tightly so the cheese doesn’t leak out while baking. If needed, slightly dampen your fingers with water to help seal.
- Customize the Fillings: Feel free to experiment with different fillings like sausage, cooked bacon, olives, or mushrooms. The possibilities are endless!
- Cheese Matters: Use a high-quality mozzarella cheese for the best melt and stretch. You can also mix in a bit of cheddar for a sharper flavor.
- Prevent Sticking: Use parchment paper or lightly grease your baking sheet to ensure the pizza bombs lift off easily after baking.
- Make Ahead: Assemble the pizza bombs ahead of time and store them in the refrigerator. Bake them just before serving for a fresh, hot appetizer.
- Supreme Pizza Bombs: Add diced bell peppers, onions, black olives, and crumbled sausage for a supreme pizza flavor.
- Hawaiian Style: Add small chunks of pineapple and ham along with the cheese for a sweet-and-savory twist.
- Buffalo Chicken Bombs: Replace the pepperoni with shredded rotisserie chicken tossed in buffalo sauce. Pair with ranch for dipping!
- Vegetarian Bombs: Skip the pepperoni and add sautéed mushrooms, spinach, or roasted red peppers.
- Refrigerator: Store leftover pizza bombs in an airtight container in the fridge for up to 3 days.
- Reheating: Reheat in the oven at 350°F (175°C) for 8-10 minutes to restore the crispy exterior. Avoid microwaving, as it may make the dough soft and soggy.
- Freezing: To freeze, assemble the pizza bombs (but don’t bake them), place them on a baking sheet, and freeze until solid. Transfer to a freezer bag and bake straight from frozen, adding a few extra minutes to the bake time.
- Game Day Snacks: These pizza bombs are a guaranteed hit for sports parties and gatherings.
- After-School Treat: Kids will love these easy-to-eat, cheesy bites as a quick snack.
- Potlucks & Parties: Make a big batch—these disappear fast at potlucks, BBQs, or holiday parties!
- Lazy Weeknight Dinner: Serve with a salad for a fun and easy dinner the whole family will enjoy.
ADVERTISEMENT
Why You’ll Love These Pizza Bombs 
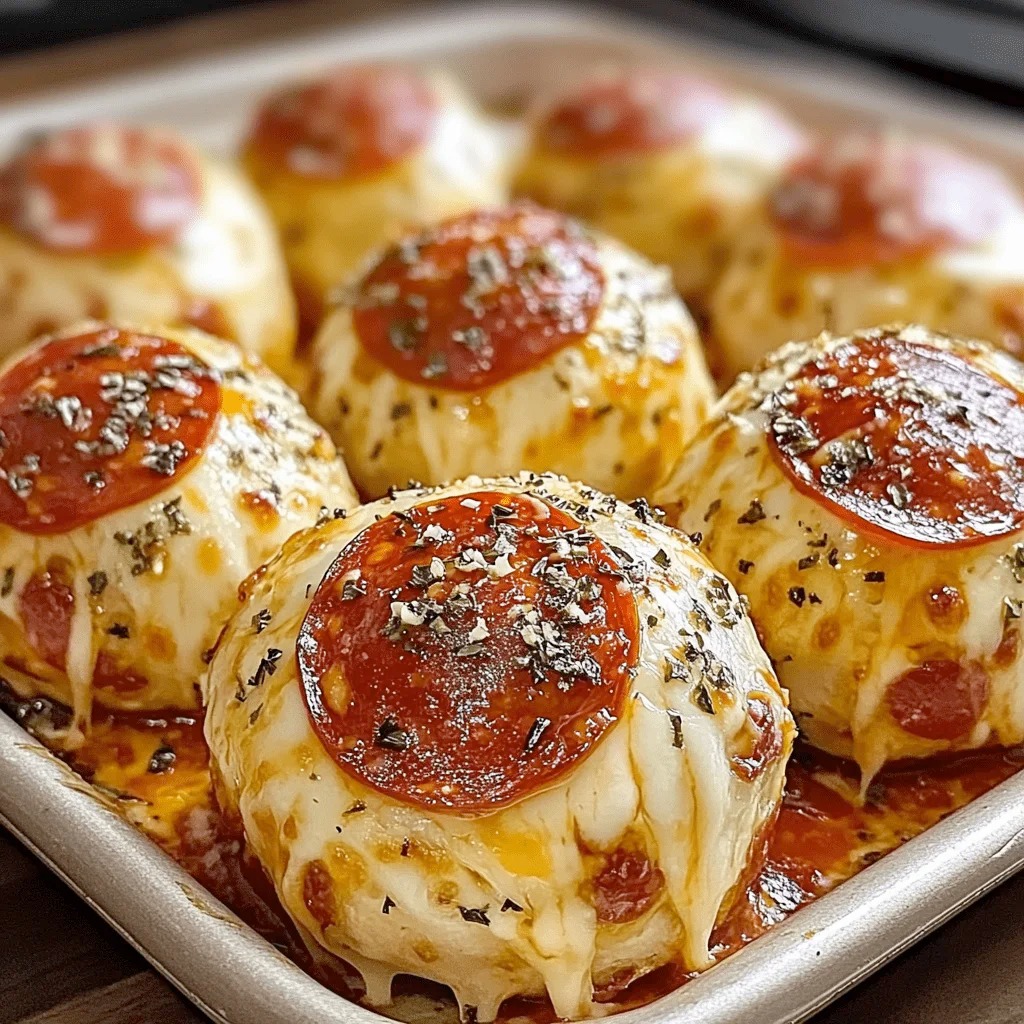
These mini pizza bites are perfect for parties, game nights, or a fun twist on pizza night! With a golden, crispy exterior, gooey mozzarella cheese, and flavorful pepperoni hidden inside, these pizza bombs are portable, shareable, and absolutely addictive. The best part? They’re super easy to make and require just a handful of ingredients!
Ingredients 
For the Pizza Bombs:
For the Garlic Butter Topping:
Optional Dipping Sauces:
Instructions 
Step 1: Prepare the Dough
Step 2: Assemble the Pizza Bombs 
Step 3: Brush with Garlic Butter 
Step 4: Bake the Pizza Bombs 
Step 5: Serve and Enjoy! 
Tips for Success 
Read more on next page
ADVERTISEMENT
ADVERTISEMENT
Variations 
How to Store and Reheat 
Perfect for Any Occasion 
Final Thoughts 
These Cheesy Pepperoni Pizza Bombs are everything you love about pizza wrapped into bite-sized perfection! From the buttery garlic topping to the gooey cheese and savory pepperoni, every bite is bursting with flavor. They’re easy to make, endlessly customizable, and perfect for sharing.


ADVERTISEMENT
ADVERTISEMENT


